This guide is a translation of the english original guide Quick Install Guide - Single Zone .
UNDER_CONSTRUCTION by Helene (Unlicensed)
Ceci est un guide d’installation pas-a-pas pour votre Toadi pour les jardins les moins compliques.
Ce guide est fait pour vous si:
vous n’avez qu’une seule zone a tondre
votre chargeur se trouve dans ou a moins de 3m de la zone a tondre
Toadi n’a pas besoin de passer dans des passages etroits
Si vous ne satisfaisez pas une des conditions ci-dessus, referrez-vous au mode d’emploi multi-zones Quick Install Guide - Multi Zone.
Etape 1: Telechargez l’application Toadi app de l’Apple Store
Ouvrez l’Apple Store (pour iPhones) ou Google Play Store (pour telephones Android) et telechargez l’application Toadi.
Vous trouverez l’application en cherchant le mot clé “Toadi|” dans l’AppStore ou en cliquant sur le lien direct ci-dessous:
Etape 2: Enregistrez votre adresse email
Une fois l’application telechargee, celle-ci vous demandra d’enregistrer votre adresse email.
Une fois l’adresse email remplie, il vous faudra confirmer l’enregistrement en cliquant sur le lien dans l’email reçu à cette adresse.

Etape 3: Déballer Toadi
Ouvrez le paquet extérieur et le paquet intérieur pour révéler votre Toadi.
N’utilisez pas de couteau pour ne pas risquer d'endommager votre Toadi.
Déballez la station de charge.
Etapes 4 - 7: Vidéo d’instructions
Etape 4: Installation du chargeur
Installez le chargeur:
Directement sur l’herbe ou à 3 mètres de la surface à tondre
sur une surface plane
sans obstacles dans un rayon de 1 mètre autour du chargeur
dans un endroit avec réception WiFi
Branchez le charegur dans une prise
N’accrochez pas le chargeur au sol de maniètre définitive tant que l’installation n’a pas été terminee.
Etape 5: Positionner Toadi sur sa base
Place Toadi on the Charging Station
With the center of her back aligned with the Charging Station
Wait for Toadi’s eyes to light up
Step 6: Connect to WiFi
Add your network details in the App
Wait for the QR code to be shown
Once the QR code is shown on the app
Hold your phone 20-30 cm in front of Toadi in the middle of her screen
Wait for Toadi to show her “WiFi” Eyes - More info on Toadi’s eyes
Even when a network has been added, the App will still show the “Add a network” button. You can add additional networks here. i.e: The 2.4 and 5 GHz version of your WiFi network

Step 7: First walk
Go stand 3m in front of Toadi
Wait for her eyes to ‘find’ you
Toadi’s eyes will go left and right
When she sees you her eyes will become full circles
If she can’t find you, move back and forth 1-2m
Toadi will drive off her Charging Station towards you
Walk in front of Toadi around the outer border of the mowing zone
Walk slowly so Toadi can follow
When taking sharp turns give Toadi the time to turn
When returning back at the Charging Station
Take a big turn so Toadi can drive straight towards the Charging Station
Stand above or behind the Charging Station
Once Toadi’s eyes are full circles, step away from the Charging Station
Toadi will now Auto-Dock
She will ride towards the station and turn around
She will move her back left and right to find the ideal position
This can take several minutes before she has found the ideal position
When Toadi has docked she will make the first version of the map of your garden
When Toadi shows ‘Sad Eyes’ you must lift her up, place her back on the Charging Station and repeat this process - More info on Toadi’s eyes
Do not do this process early after sunrise or right before sunset. There might be still enough light for your eyes, but not enough for Toadi
Depending on the size and complexity of your garden, the mapping of your garden can take 30m up to a few hours.
Step 8: Instruction video
Step 8: Manual Explore
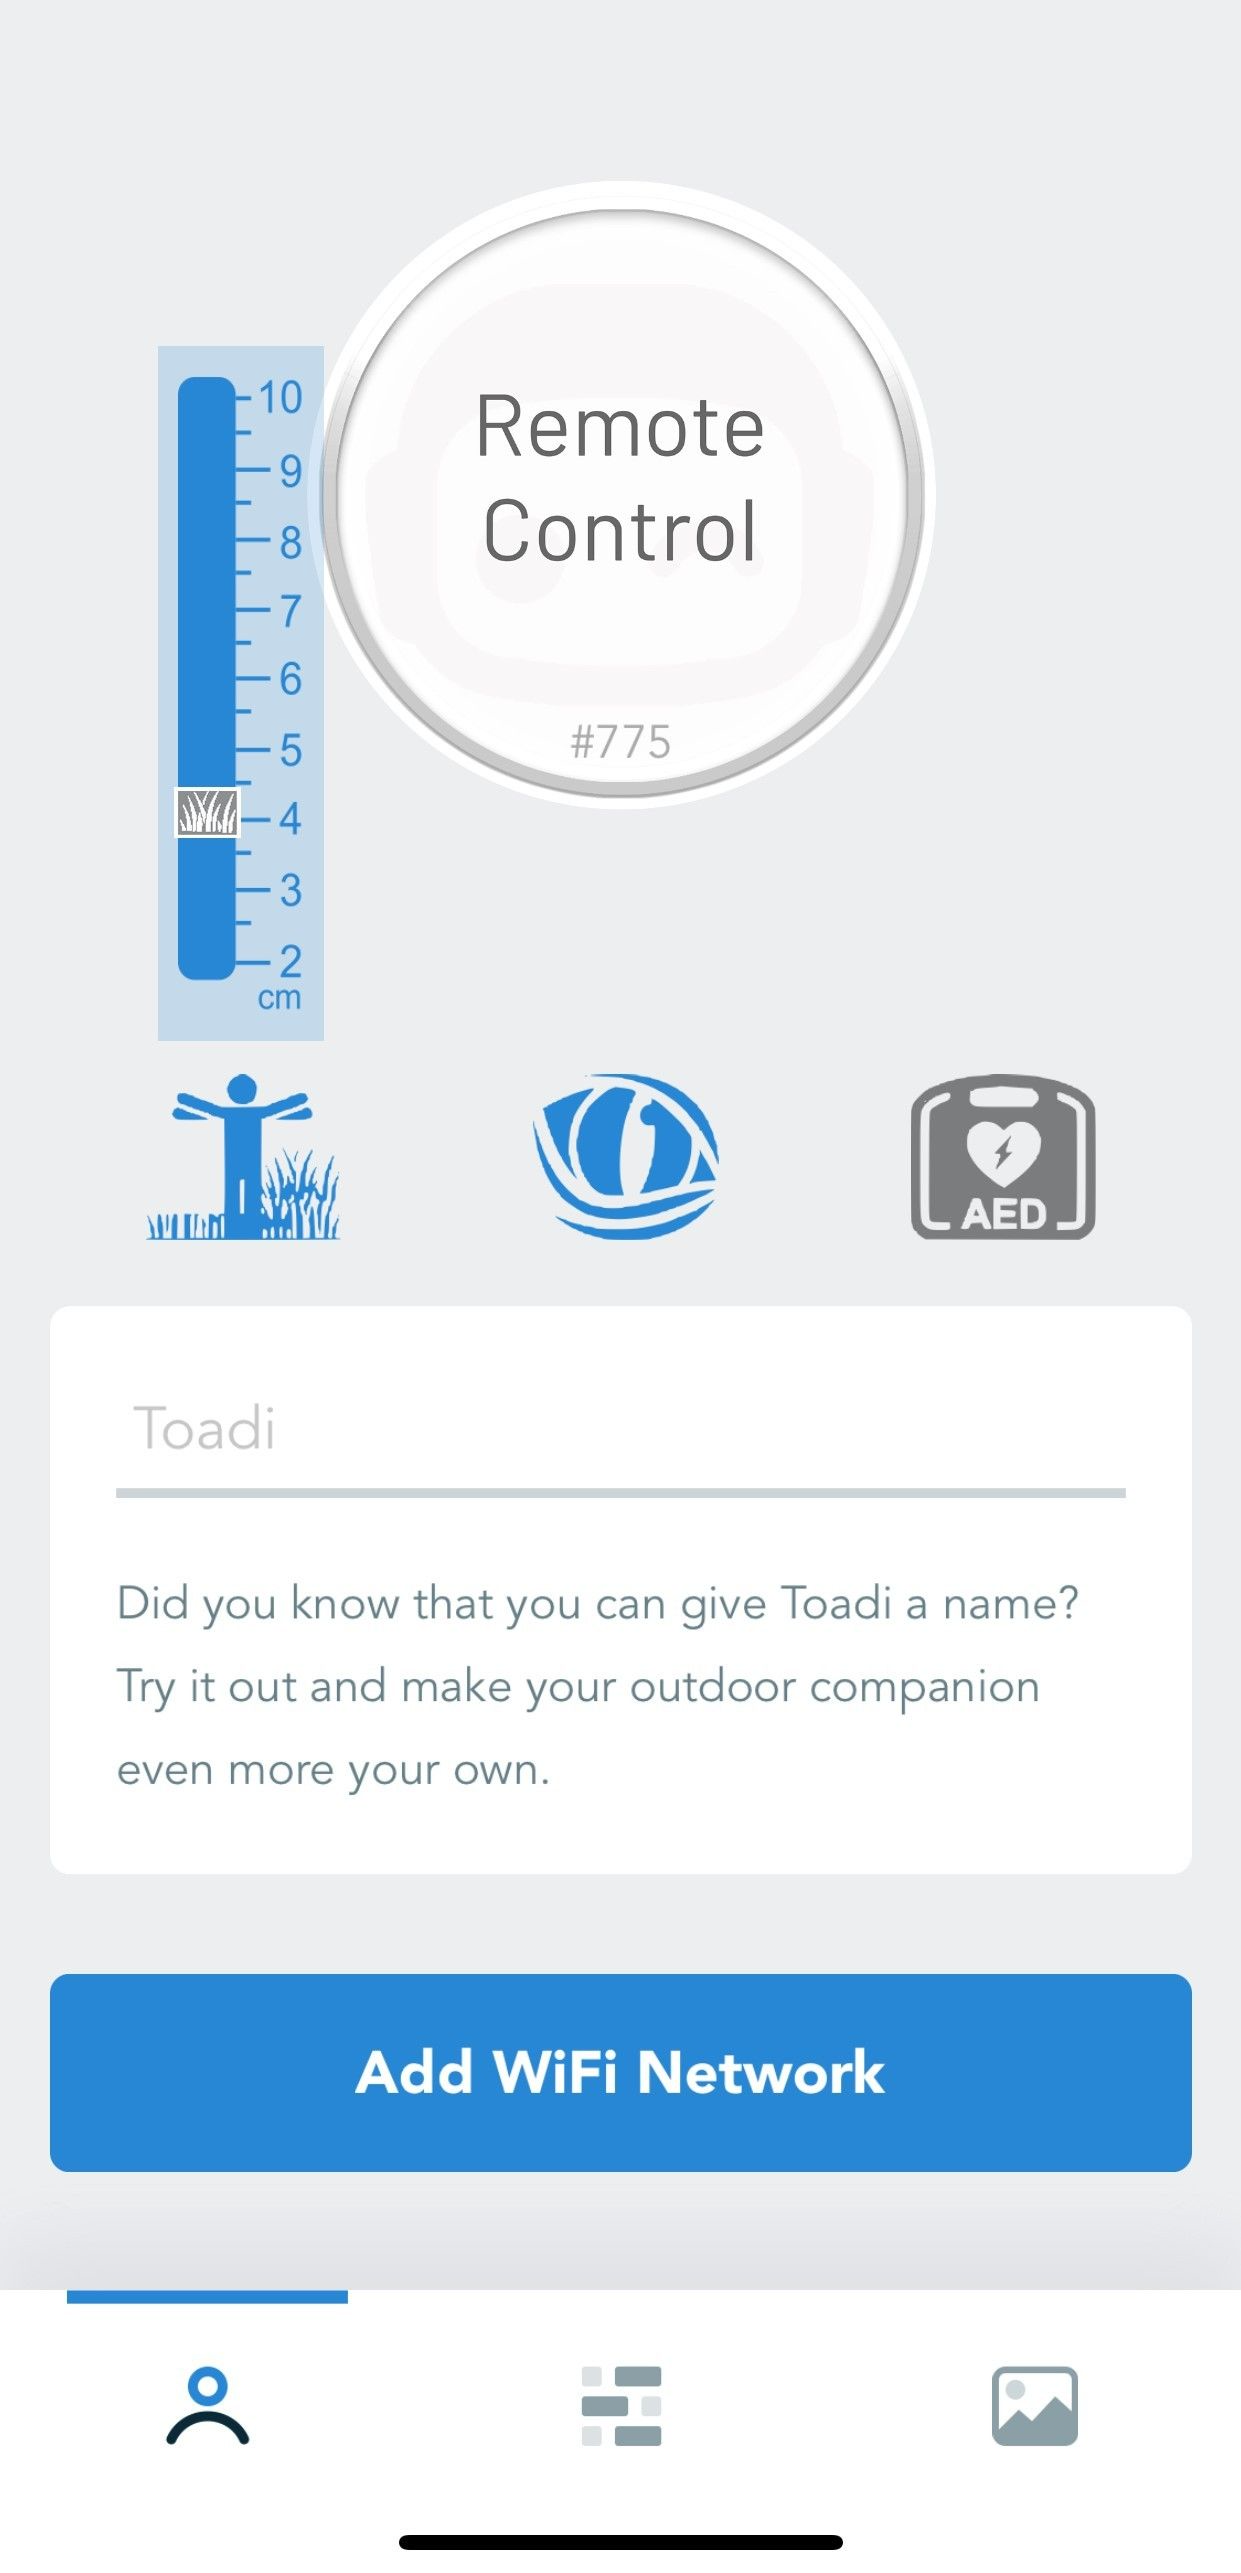
To ensure a stable WiFi connection during this process we advise to connect Toadi to your phone’s hotspot. Click on “Add WiFi Network” in the Toadi App and follow the instructions of Step 6.
Go to the Toadi App and select “Remote Control”
The app will send you to the Toadi Interface
Click on “Daredevil”
Select “Start Manual Explore”
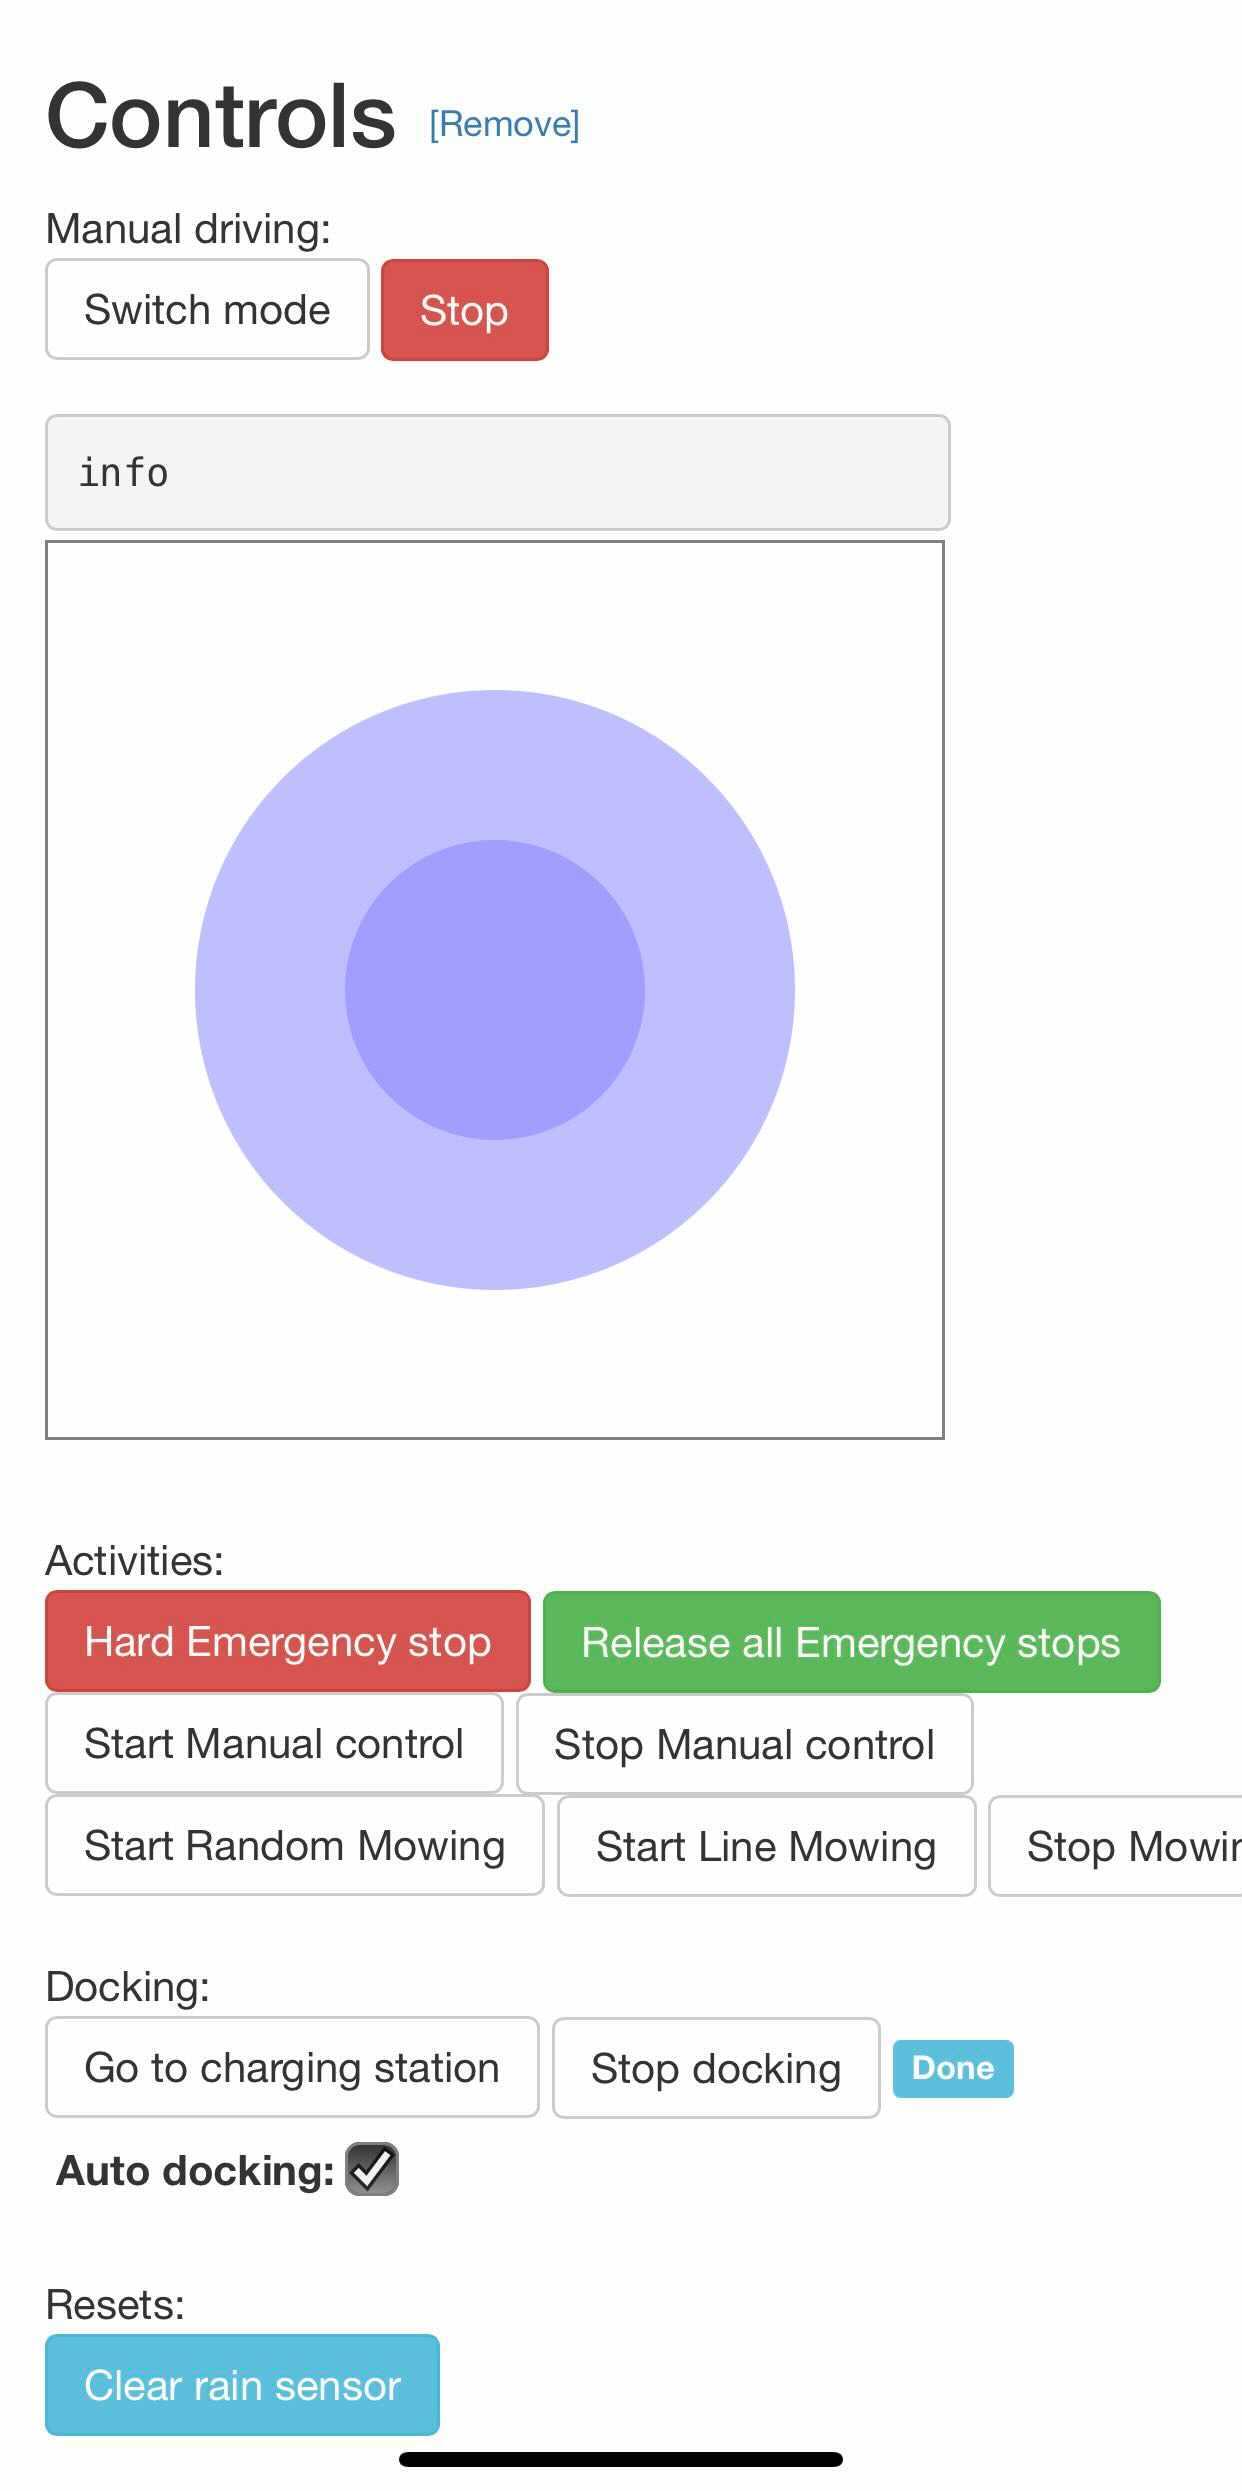
Toadi will ride 1-2m of the Charging StationClick on “Controls”
Use the joystick (the purple circle) to control your Toadi
Walk behind your Toadi and use the joy stick to drive Toadi around your garden
Walk around your garden using the overlay method
Walk the outer edge of the initial walk
Overlap the first circle by 6m and turn Toadi around (by using the joy stick)
Repeat the first circle in the opposite direction
Overlap the reverse circle again by 6m
Move closer to the inside of your garden and repeat the 4 previous steps.
Depending on the size of your garden:You can reduce the overlap
You can repeat this step a few times
Drive Toadi back to the Charging Station
Go to the “Live” tab
Start streaming
Check if Toadi places a green box around the Charging Station
Select “Go to Charging Station”
Toadi will Auto Dock and create a detailed version of your garden
During this process Toadi may ride around in your garden to gather additional data
The duration of this process depends on the size and complexity of your garden and can take several hours.
Step 9: Set mowing height
Go to the Toadi App
Change the height
The height will be changed when Toadi starts mowing
Step 10: Mowing
When the Explore Map has been completed, Toadi will start mowing.
She will do so3 hours after sunrise
2 hours after the last rain detection
2 hours before sunset
Until she requires charging
When your grass has not been cut for a long time, Toadi mowing lines will be visible and your garden will look like a Picasso painting. This will disappear after a few days/weeks.
Depending on the size of your garden, Toadi will mow your complete garden minimum once per week. For smaller and less complex gardens this can be multiple times per week
For further guidance on the use of your Toadi, please visit Quick Usage Guide - Single Zone