This is a step-by-step process on how to install your Toadi with the highest success rate for the more complex gardens. Use this installs guide when:
You only have multiple mowing zone
You’re Charging Station further than 3m from the mowing zone
Toadi has to pass through a narrow passage
If you do not qualify for any of the 3 conditions above, please use Quick Install Guide - Single Zone.
Step 1: Download the Toadi App from your App Store
Go to your phone's app store and download the Toadi App.
You can find the Toadi App by searching for “Toadi” in the App Store or by clicking on the link below.
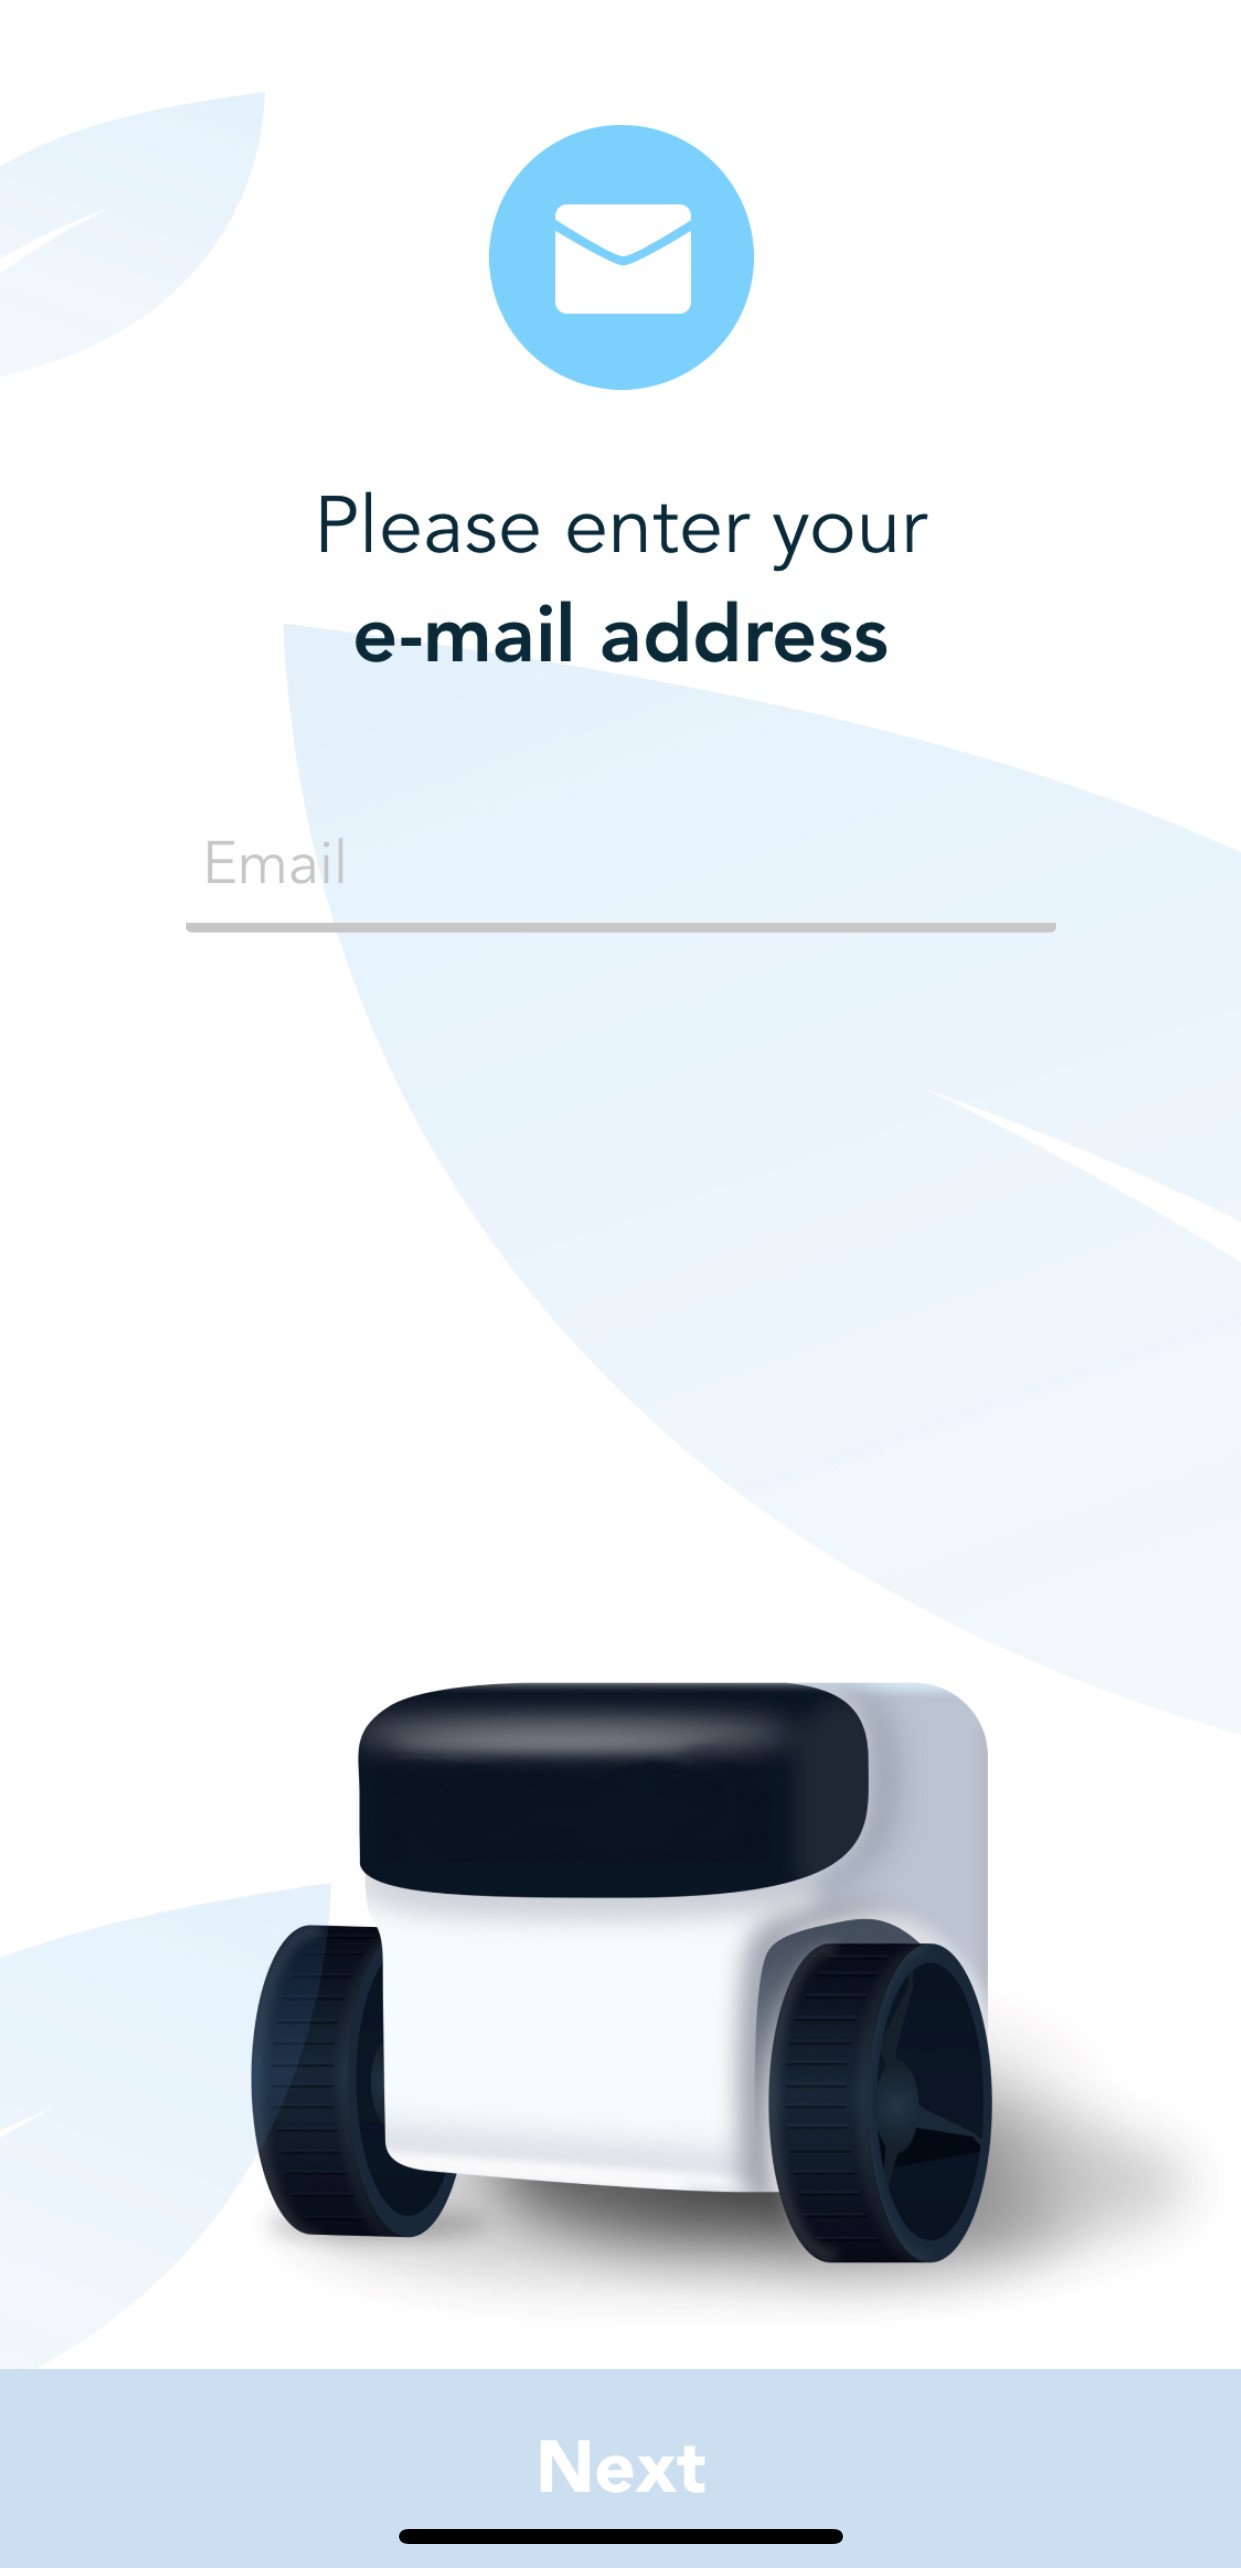
Step 2: Register your E-mail address
Once you have downloaded the app, it will ask you to register your E-mail address.
Then go to your inbox to confirm your E-mail address
Step 3: Unbox Toadi
Open the outer and inner box and take Toadi out of the box.
| Note |
|---|
Do not use a knife to open the white box |
Take the Charging Station out of the box
Step 4 - 7: Instruction video
Step 4: Place the Charging Station
Place the Charging Station:
As close as possible to the mowing zone
On a flat surface
With no obstacles within 1m radius around the Charging Station
In an area with Wi-Fi coverage
Plug the Charging Station into a power outlet
| Info |
|---|
Do not pin down or screw on the Charging Station until the installation has been completed |
Step 5: Place Toadi on the Charging Station
Place Toadi on the Charging Station
With the center of her back aligned with the Charging Station
Wait for Toadi’s eyes to light up
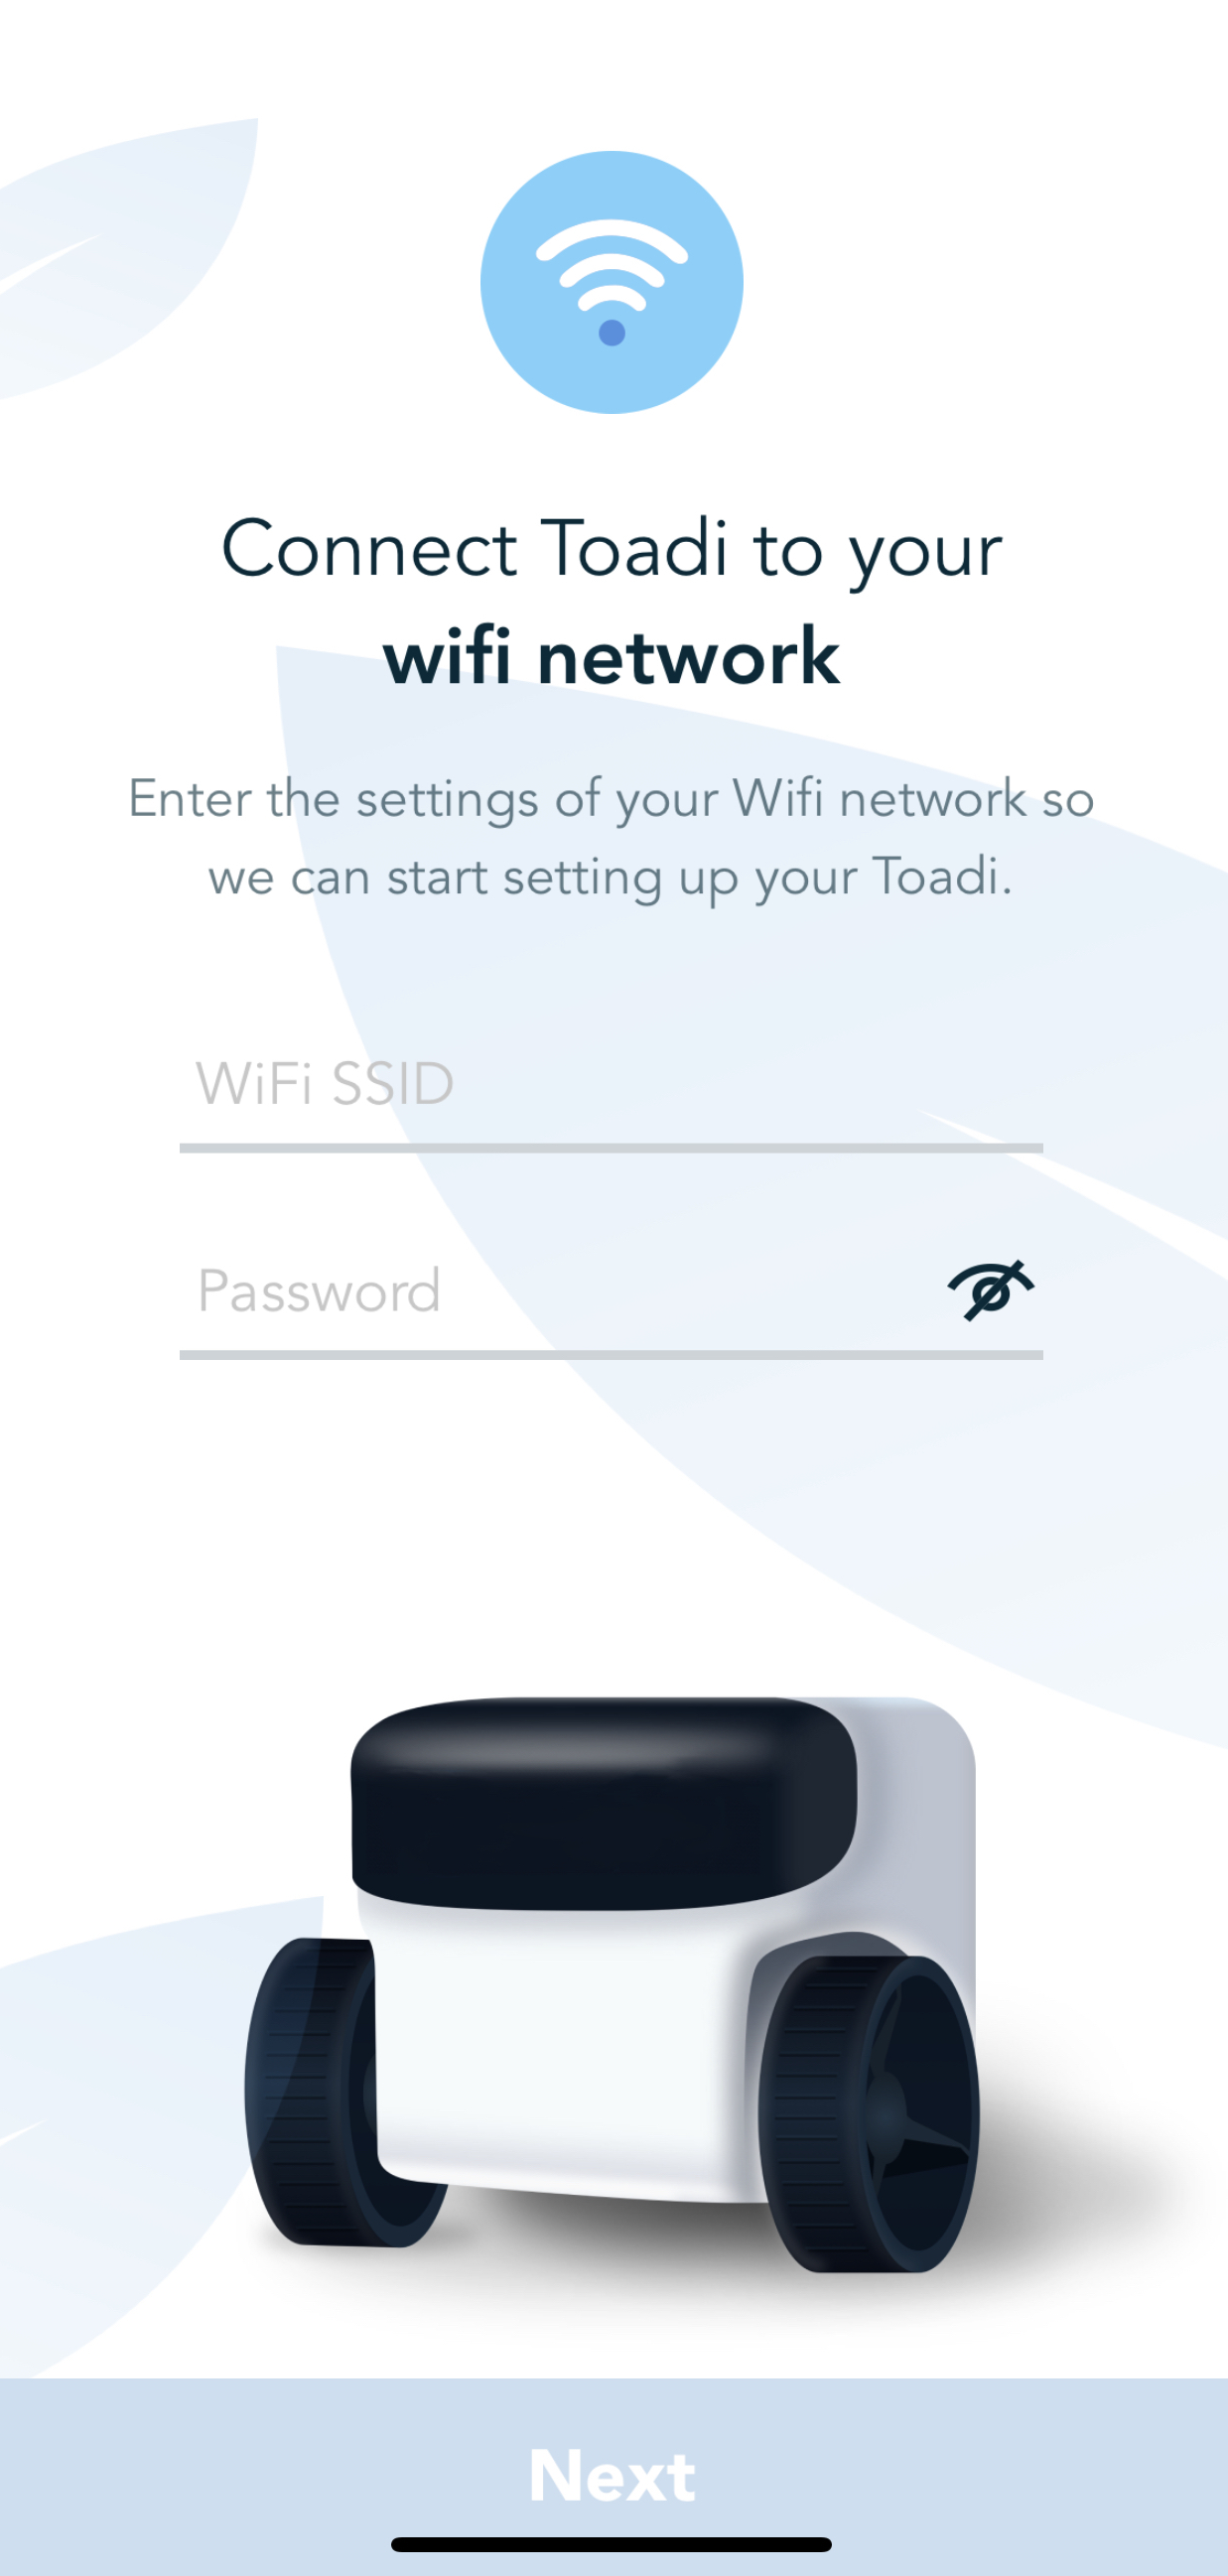
Step 6: Connect to Wi-Fi
Add your network details in the App
Wait for the QR code to be shown
Once the QR code is shown on the app
Hold your phone 20-30 cm in front of Toadi in the middle of her screen
Wait for Toadi to show her “Wi-Fi” Eyes - More info on Toadi’s eyes
| Info |
|---|
Even when a network has been added, the App will still show the “Add a network” button. You can add additional networks here. i.e: The 2.4 and 5 GHz versions of your Wi-Fi network |
Step 7: First walk
Go stand 3m in front of Toadi
Wait for her eyes to ‘find’ you
Toadi her eyes will go left and right
When she sees you her eyes will become full circles
If she can’t find you, move back and forth 1-2m
Toadi will drive off her Charging Station towards you
Walk in front of Toadi around the outer border of the mowing zone
Walk slowly so Toadi can follow
When taking sharp turns, give Toadi the time to turn
Guide Toadi to the additional zones or through the narrow passage
Use a passage that has no borders with more than 3cm difference in height
Use a passage that Toadi will always be able to take
She will always consider this safe and not detect obstacles here
Repeat this step to additional zones
You can use the same or a new passage to return to the first zone
When returning back at the Charging Station
Take a big turn so Toadi can drive straight towards the Charging Station
Stand above or behind the Charging Station
Once Toadi’s eyes are full circles, step away from the Charging Station
Toadi will now Auto-Dock
She will ride towards the station and turn around
She will move her back left and right to find the ideal position
This can take several minutes before she has found the ideal position
When Toadi has docked, she will make the first version of the map of your garden
| Info |
|---|
Do not do this process early after sunrise or right before sunset. There might be still enough light for your eyes, but not enough for Toadi |
| Warning |
|---|
When Toadi shows ‘Sad Eyes’ you must lift her up and place her back on the Charging Station and repeat this process - More info on Toadi’s eyes |
| Info |
|---|
Depending on the size and complexity of your garden, the mapping of your garden can take 30m 30min up to a few hours. |
Step 8: Instruction video
Step 8: Manual Explore
| Info |
|---|
To ensure a stable WiFi connection during this process we advise to connect Toadi to your phone’s hotspot. Click on “Add WiFi Network” in the Toadi App and follow the instructions of Step 6. |
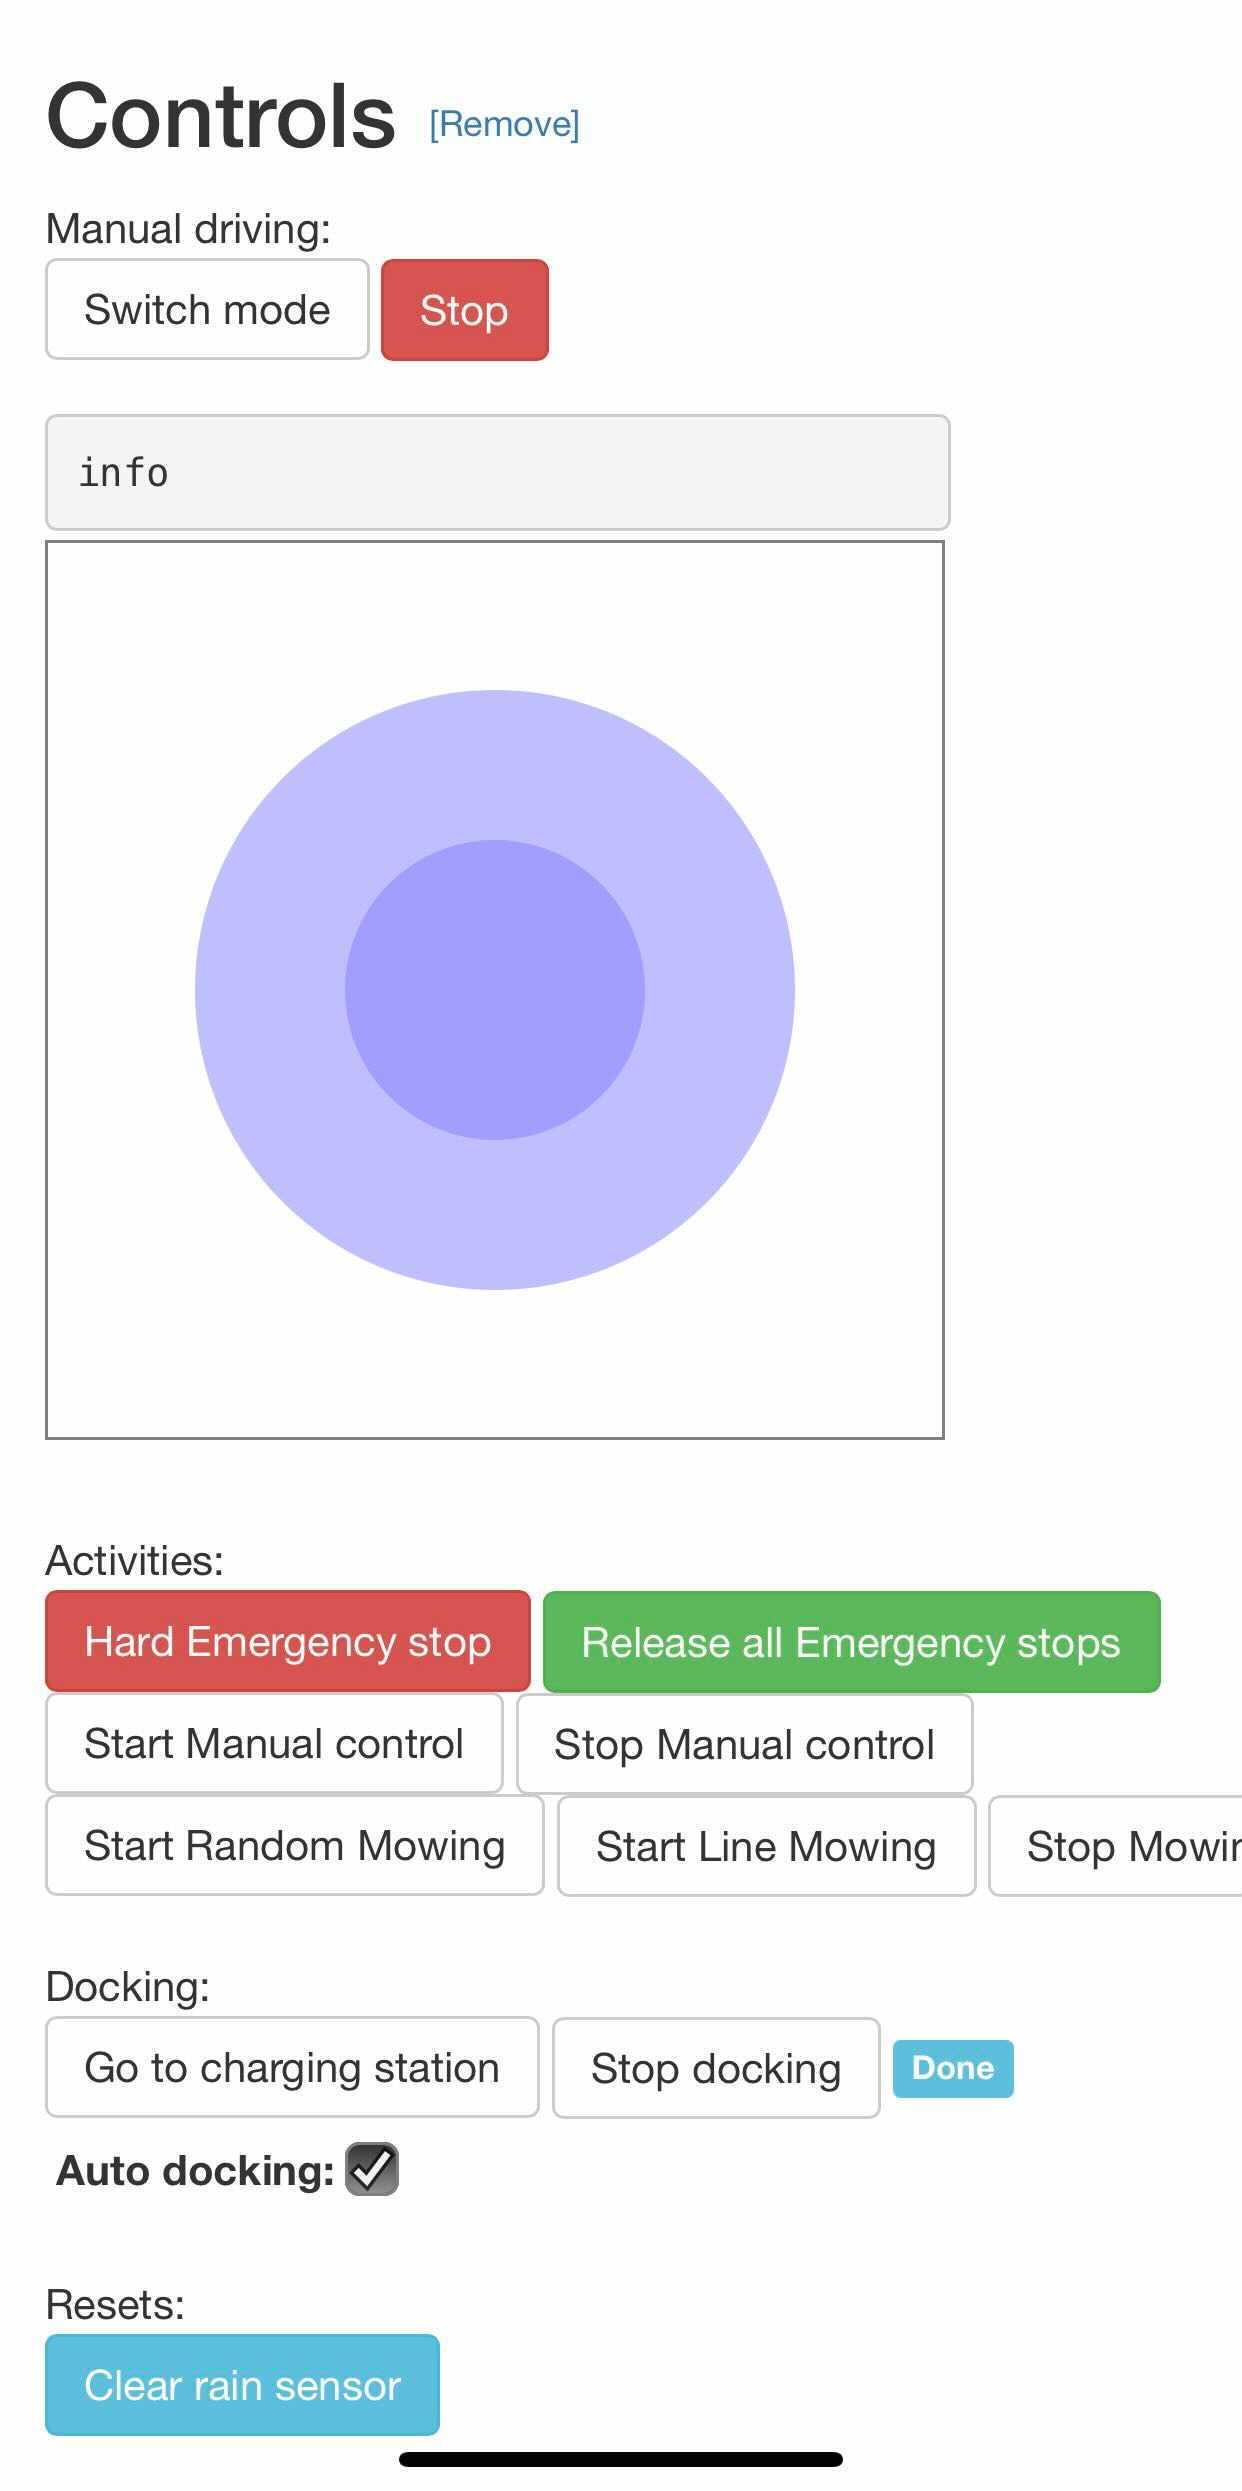
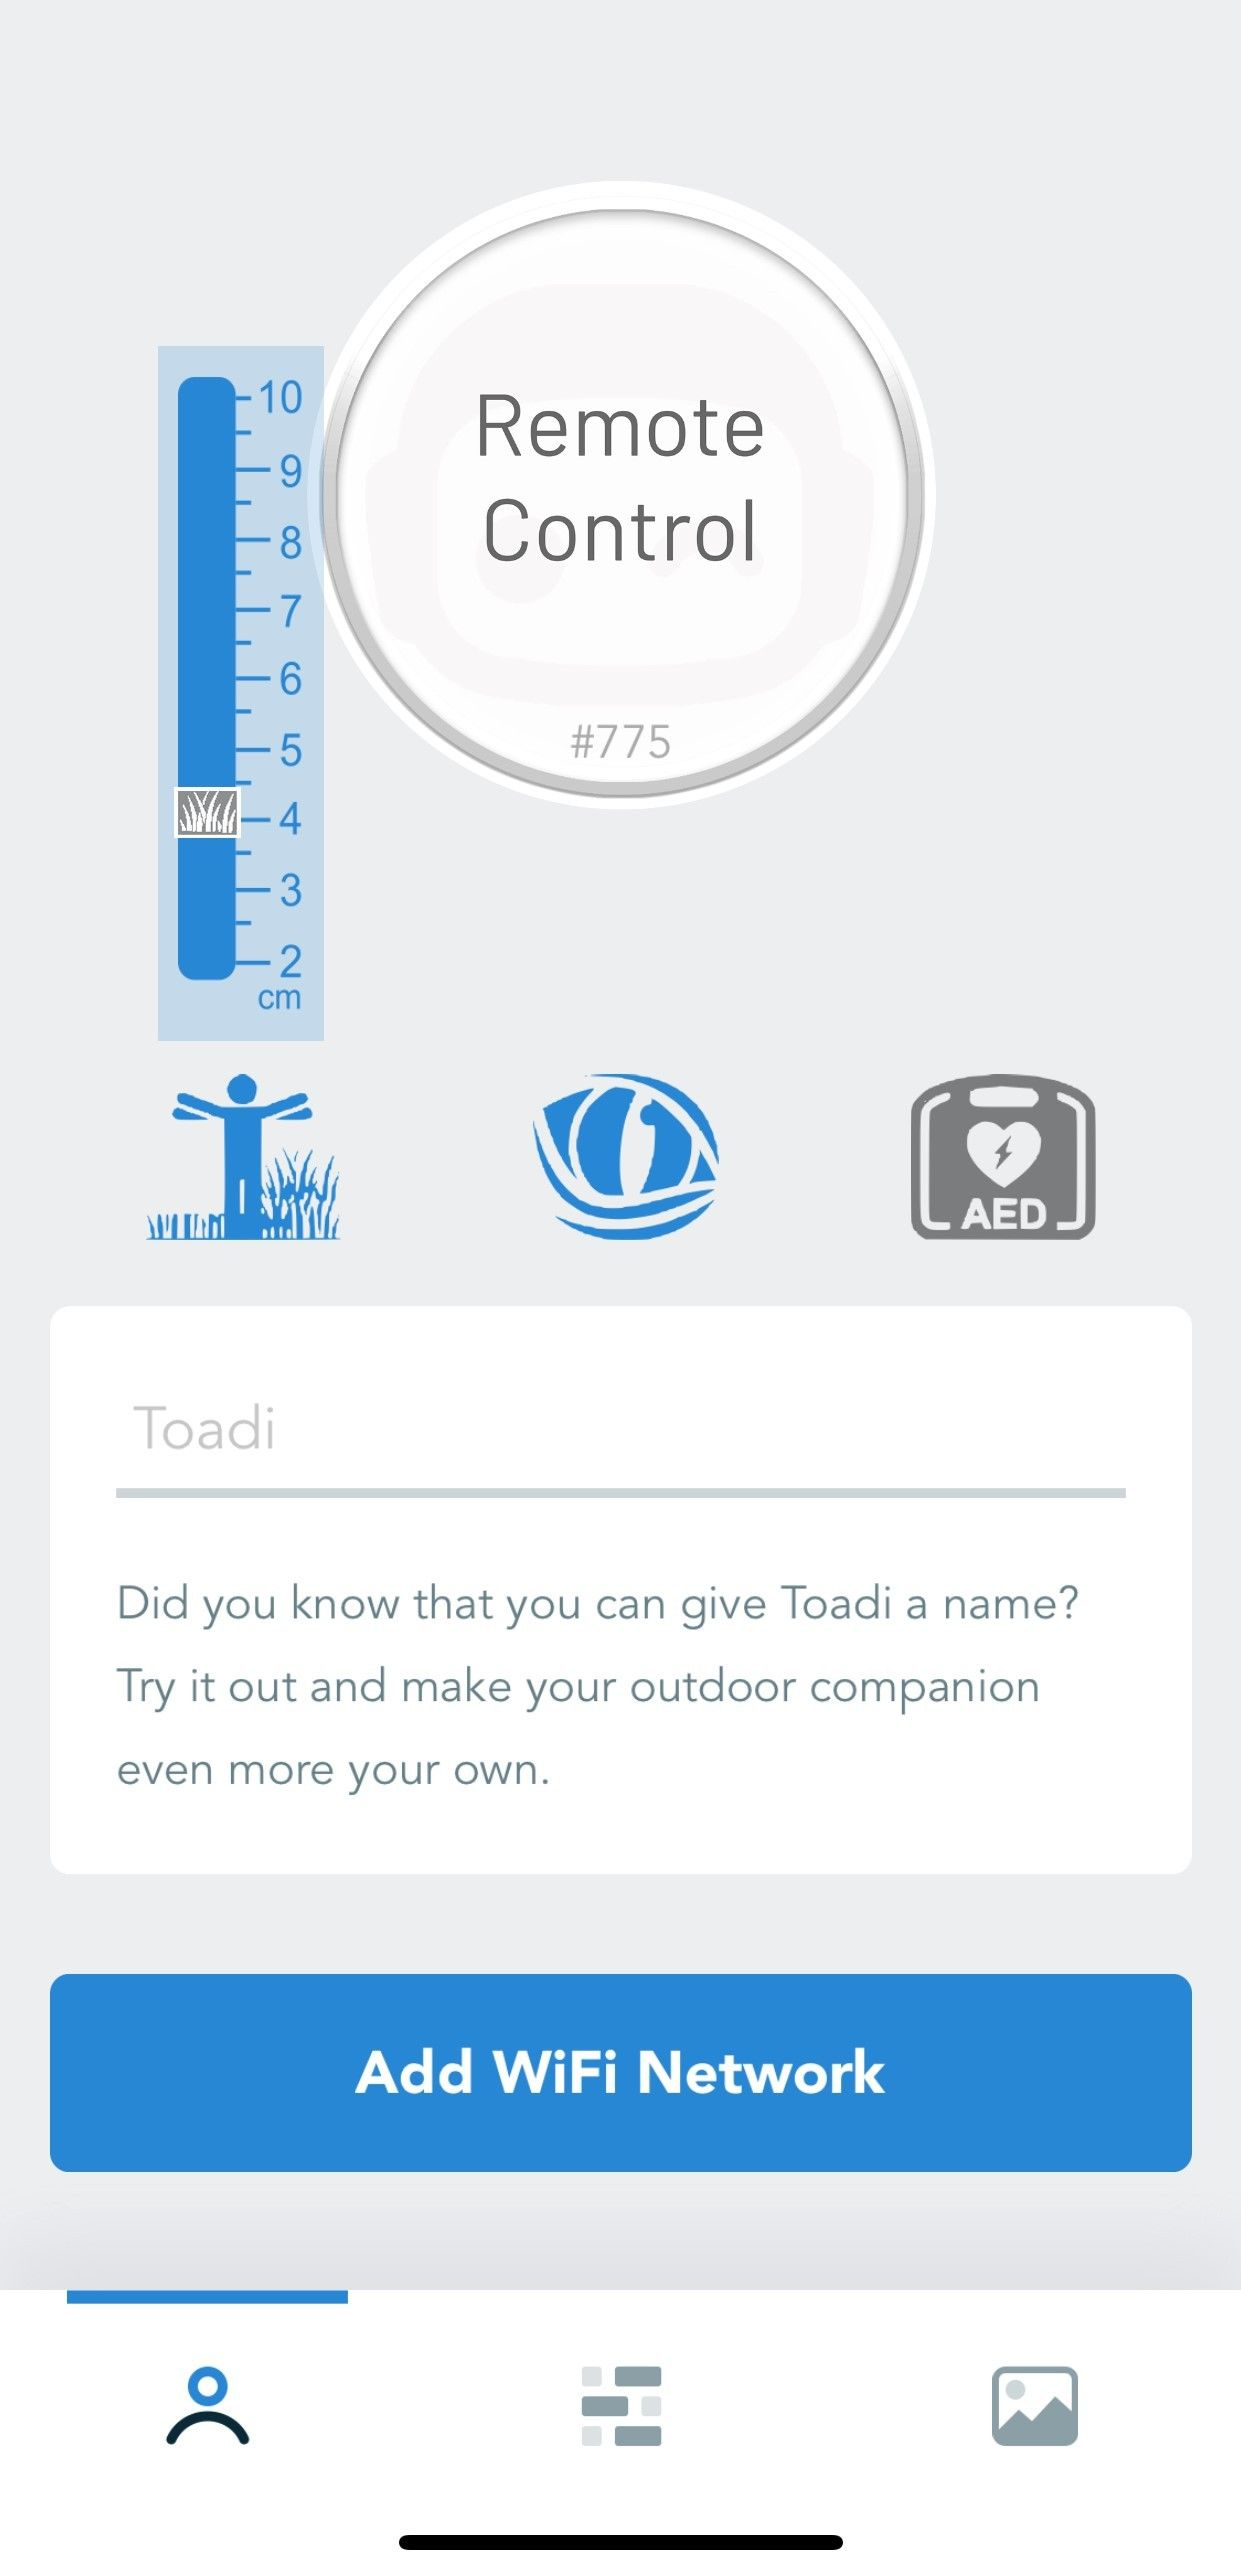
Go to the Toadi App and select “Remote Control”
The app will send you to the Toadi Interface
Click on “Daredevil”
Select “Start Manual Explore”
Toadi will ride 1-2m of the Charging StationClick on “Controls”
Use the joystick (the purple circle) to control your Toadi
Walk-behind your Toadi and use the joystick to drive Toadi around your garden
Walk around your garden using the overlay method
Walk the outer edge of the initial walk
Overlap the first circle by 6m and turn Toadi around (by using the joystick)
Repeat the first circle in the opposite direction
Overlap the reverse circle again by 6m
Move closer to the inside of your garden and repeat the 4 previous steps.
Depending on the size of your garden:You can reduce the overlap
You can repeat this step a few times
Drive Toadi to the additional zones or through the narrow passage
Use a passage that has no borders with more than 3cm difference in height
Use a passage that Toadi will always be able to take
She will always consider this safe and not detect obstacles here
Repeat this step to additional zones
You can use the same or a new passage to return to the first zone
Go to the “Live” tab
Start streaming
Check if Toadi places a green box around the Charging Station
Select “Go to Charging Station”
Toadi will Auto Dock and create a detailed version of your garden
During this process, Toadi may ride around in your garden to gather additional data
| Info |
|---|
The duration of this process depends on the size and complexity of your garden and can take several hours. |
Step 9: Set mowing height
Go to the Toadi App
Change the height
The height will be changed when Toadi starts mowing
Step 10: Mowing
When the Explore Map has been completed, Toadi will start mowing.
She will do so3 hours after sunrise
2 hours after the last rain detection
2 hours before sunset
Until she requires charging
When your grass has not been cut for a long time, Toadi mowing lines will be visible and your garden will look like a Picasso painting. This will disappear after a few days/weeks.
Depending on the size of your garden, Toadi will mow your complete garden minimum of once per week. For smaller and less complex gardens, this can be multiple times per week.
Step 11: Check Multi-Zone
| Info |
|---|
Make sure multi-zone is activated on the App |
When Toadi starts mowing, keep an eye out for when she tries to go to the additional zones
When she passes the passage without any problems, do not interfere
When you see Toadi driving back and forth on the same spot in front of the ‘safe passage’ go to the next step
Turn off multi-zone on the App
Select Reboot
When you want Toadi to mow the additional zones
Go to the Toadi App and select “Remote Control”
The app will send you to a new webpage
Click on “Controls”
In the section “Activities” click on “Start Manual Control”
Use the joystick (the purple circle) to control your Toadi
Drive Toadi to the second zone
Select “Stop Manual Control” and “Release all Emergency stops”
Toadi will now mow this zone
Repeat the above steps for additional zones
| Tip |
|---|
Alternatively, you can use our Remote Control Service who will take over this process for you. |
Step 12: Check Auto Docking
| Info |
|---|
Make sure Auto Docking is activated on the App |
By the end of the first mowing day, keep an eye out for Toadi if she is able to reach the Charging Station.
When she drives to her Charging Station and auto docks, do not interfere
When you see Toadi driving back and forth on the same spot in front of the ‘safe passage’ to go to the Charging Station, go to the next step
Turn off auto docking on the App
Select Reboot
When you want Toadi to return to her Charging Station
Go to the Toadi App and select “Remote Control”
The app will send you to a new webpage
Click on “Controls”
In the section “Activities” click on “Start Manual Control”
Use the joystick (the purple circle) to control your Toadi
Drive Toadi to the Docking Station
Select “Stop Manual Control” and “Go to Charging Station”
Toadi will now dock
When you want Toadi to start mowing
Go to the Toadi App and select “Remote Control”
The app will send you to a new webpage
Click on “Controls”
In the section “Activities” click on “Start Manual Control”
Use the joystick (the purple circle) to control your Toadi
Drive Toadi to the mowing zone
Select “Stop Manual Control” and “Release all Emergency stops”
Toadi will now mow this zone
Repeat the two steps above every day
| Tip |
|---|
Alternatively, you can use our Remote Control Service who will take over this process for you. Please contact support@toadi.com to request the Remote Control Service. |
For further guidance on the use of your Toadi, please visit Quick Usage Guide - Multi Zone